
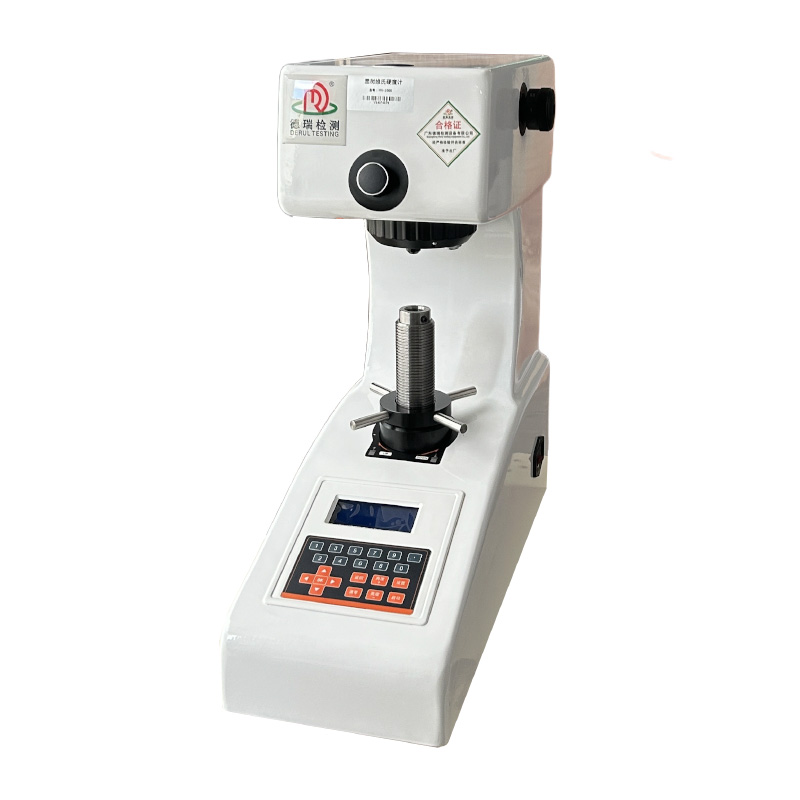
optical brinell hardness testing machine
148005.0 INR/Unit
Product Details:
- Resolution 0.01 mm
- Power Supply 220V AC, 50Hz
- Response Time Immediate
- Features Robust design, precise measurement, easy operation, optical measurement system
- Test Range 8-650 HBW
- Automation Grade Semi-automatic
- Mounting Type Floor mounted
- Click to view more
X
optical brinell hardness testing machine Price And Quantity
- 1 Unit
- 148005.0 INR/Unit
- 3000 kgf
- Cast Iron
- 500 kgf
- Powder coated and corrosion resistant
- 20x or 25x (optical reader)
- Hardened steel ball, 5 or 10 mm
- 1015 seconds (adjustable)
- Motorized or manual
- Overload protection, emergency stop switch
- IS: 2281-2005, ASTM E10-08
- Attachable optical viewer
optical brinell hardness testing machine Product Specifications
- 85% RH
- 50 Hz
- Single specimen at a time
- Approx. 450 kg
- Up to 3000 kgf
- 8650 HBW
- 100 mm
- 220 mm
- 0.01 mm
- Industrial metal hardness testing
- Optical Brinell Hardness Testing Machine
- Floor mounted
- Immediate
- Robust design, precise measurement, easy operation, optical measurement system
- 8-650 HBW
- Semi-automatic
- 220V AC, 50Hz
- 5 mm to 6 mm diameter ball indenter
- Complies with IS:2281, BS:240, ASTM:E10
- Manual/Automatic
- Brinell hardness testing of metals and alloys
- Optical microscope with graduated screen
- 150 mm
- Analog/Optical
- Standard
- Up to 220 mm height
- 220V AC
- Standard
- 10C 40C
- 3000 kgf
- Cast Iron
- 500 kgf
- Powder coated and corrosion resistant
- 20x or 25x (optical reader)
- Hardened steel ball, 5 or 10 mm
- 1015 seconds (adjustable)
- Motorized or manual
- Overload protection, emergency stop switch
- IS: 2281-2005, ASTM E10-08
- Attachable optical viewer
optical brinell hardness testing machine Trade Information
- Cash in Advance (CID)
- 100 Unit Per Month
- 7 Days
- All India
Product Description
| Type | DR-C203 |
| Measuring range | 20-88HRA, 20-100HRB, 20-70HRC |
| Test force | 588, 980, 1471N (60, 100, 150kgf) |
| Max. height of test piece | 165mm |
| Distance from indenter to outer wall | 160mm |
| Rockwell scaleplate | HRA,HRB,HRC,HRD,HRE,HRF,HRG,HRH,HRK |
| Hardness measuring range | HRA:20-88 HRB:20-100 HRC:20-70 HRD:40-77 |
| HRF:60-100 HRG:30-94 HRH:80-100 HRK:40-100 | |
| Initial force | 1000kgf (98.07N) |
| Dimensions | 466 x 238 x630mm |
| Weight | Approx. 70kg |
| Accessories | Large flat anvil: 1 pc. Small flat anvil: 1 pc. V-notch anvil: 1 pc. Diamond cone indenter: 1 pc. 1/16" steel ball indenter: 1 pc. Rockwell standardized block: 5pcs. |
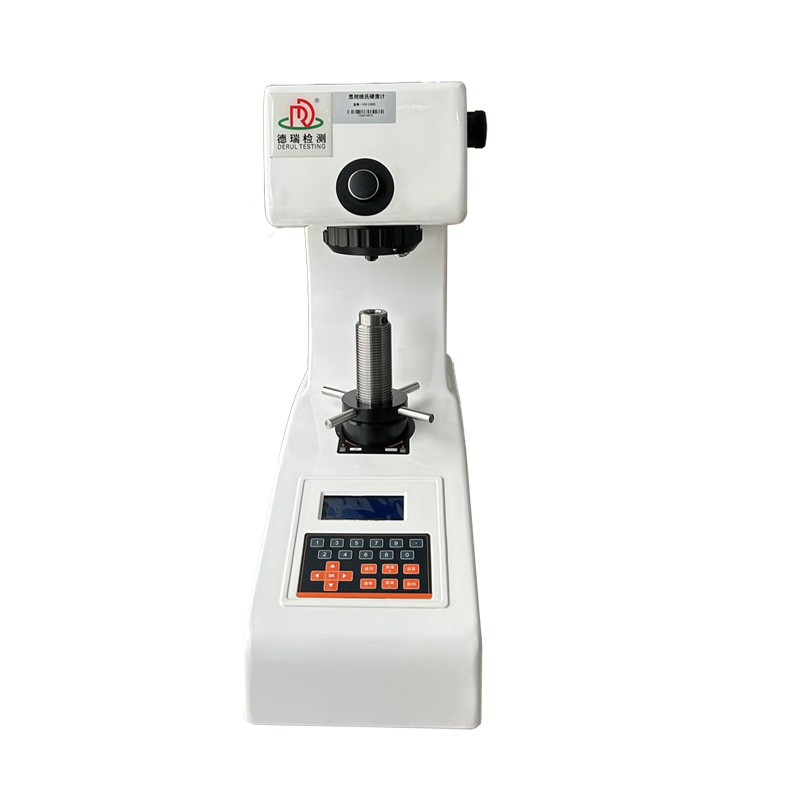
The optical Brinell hardness tester is a high-precision hardness testing equipment based on the principle of Brinell hardness testing and combined with optical measurement technology. It measures the indentation diameter through an optical system to calculate the Brinell hardness value of the material. Compared with traditional Brinell hardness testing machines, optical Brinell hardness testing machines have higher measurement accuracy and automation, and are widely used for hardness testing of materials such as metals, alloys, ceramics, etc.
Working principle of optical Brinell hardness tester
1. Testing principle
Use a hard alloy ball (or steel ball) of a certain diameter as the indenter, press it into the surface of the tested material under the specified test force, and maintain it for a certain period of time before removing the test force.
Measure the diameter of the indentation using an optical microscope or digital imaging system, and calculate the hardness value (HB) using the Brinell hardness formula.
Product Features
1. High precision optical measurement
Using high-resolution optical microscopes or digital imaging systems to accurately measure indentation diameters and ensure the accuracy of hardness values.
2. Automated operation
Equipped with a computer control system to achieve automatic loading and unloading of test force and automatic measurement of indentation.
3. Multifunctionality
Can test various materials, such as metals, alloys, ceramics, plastics, etc.
4. Wide range of experimental force
Different test forces (such as 9.807N, 49.03N, 980.7N, etc.) can be selected based on the hardness of the material.
5. Data storage and analysis
Support the storage, analysis, and printing of test data, and generate test reports.
6. User friendly interface
Equipped with a touch screen or computer software, easy to operate, and supports a multilingual interface.
7. Safe and reliable
Equipped with overload protection, emergency stop and other safety devices to ensure safe operation.
Common problems and solutions
1. Unclear indentation
Check if the test force is sufficient, if the indenter is worn, and if the material surface is flat.
2. Large deviation in hardness values
Check whether the diameter of the indenter and the test force are accurate, and whether the optical measurement system is calibrated.
3. Optical system malfunction
Check if the light source, lens, and imaging system are working properly, clean the lens or contact the manufacturer for repair if necessary.
4. The equipment cannot load the test force
Check if the power supply, hydraulic system, or motor is working properly.
Installation Guide
1. Venue selection
Choose a stable, level, and vibration free workbench or floor to avoid direct sunlight.
2. Power requirements
Ensure that the power supply voltage and frequency meet the equipment requirements, equipped with independent power switches and grounding devices.
3. Installation steps
Handling: Use a forklift or crane to transport the equipment to the designated location, taking care to avoid collisions.
Fixed: Adjust the equipment feet to ensure that the equipment is level and stable.
Connect power supply: Connect the power cord according to the instructions to ensure correct wiring.
Check the pressure head and optical system: Install the pressure head to ensure it is securely installed; Check if the optical system is clean.
4. Debugging and Calibration
After booting up, follow the instructions to set parameters and debug the system.
Use standard hardness blocks to calibrate equipment and ensure measurement accuracy.
5. Operation training
Train operators to ensure they are familiar with equipment operation, maintenance, and troubleshooting methods.
Precautions
Ensure that the material surface is clean and flat before testing.
Select the appropriate test force and indenter diameter based on the hardness of the material.
Regularly clean and calibrate the optical system to ensure measurement accuracy.
In case of unsolvable problems, promptly contact the manufacturer's technical support.
The optical Brinell hardness tester is a high-precision tool for material hardness testing, and correct installation and operation are key to obtaining accurate test results.
Precise and Standard-Compliant Measurements
Engineered for industrial environments, the optical Brinell hardness tester ensures compliance with major standards including IS: 2281 and ASTM E10-08. Its robust design, coupled with high precision optical measurement (resolution of 0.01 mm), guarantees consistent results. Easily test metals and alloys within a wide hardness range of 8-650 HBW using certified methods and reliable instrumentation.
User-Friendly Operation and Versatility
Operators benefit from a semi-automatic system that supports both manual and motorized specimen stage movement. The attachable optical viewer, available with 20x or 25x magnification, assists in clear and accurate measurement readings. With simple controls and safety features like overload protection and emergency stop, user safety and operational ease are prioritized.
Durable Construction and Broad Application
Manufactured from powder-coated, corrosion-resistant cast iron and suited for continuous industrial use, this machine is built to perform in challenging conditions. It is capable of handling a test force up to 3000 kgf and specimens up to 220 mm in height, making it suitable for a wide range of hardness testing tasks in metal processing and manufacturing facilities.
FAQ's of optical brinell hardness testing machine:
Q: How is the hardness measured using this Optical Brinell Hardness Testing Machine?
A: Hardness is determined by applying a specified force with a 5 mm or 10 mm hardened steel ball indenter onto the material surface. The resulting indentation is examined using the attachable optical microscope (20x or 25x magnification), and the diameter is measured to calculate the Brinell Hardness Number (HBW) in compliance with IS: 2281-2005 and ASTM E10-08 standards.Q: What types of materials can be tested with this machine?
A: This machine is designed for Brinell hardness testing of metals and alloys, accommodating a wide range of metallic materials within a hardness window of 8-650 HBW. Its strength and precision make it ideal for industrial metal testing applications.Q: When should the dwell time be adjusted, and how can this be done?
A: Dwell time, typically set between 10-15 seconds, may be adjusted based on material type or testing standards. Adjustments are made through the machine's control panel, ensuring standardized force application during testing for optimal accuracy.Q: Where is the Optical Brinell Hardness Testing Machine typically used?
A: This machine finds its primary application in industrial environments such as manufacturing plants, quality control laboratories, and metalworking facilities. It is floor-mounted and robustly constructed, suitable for high-volume, precise testing demands.Q: What is the maximum specimen size and test range supported by this tester?
A: The machine can test single specimens up to 220 mm in height with a test force ranging from 500 kgf to 3000 kgf. The measurable hardness range covers 8 to 650 HBW, accommodating most industrial testing requirements.Q: How does the motorized or manual stage movement benefit the user?
A: Users can select between motorized or manual specimen stage movement depending on their preference and testing needs. Motorized movement enables smoother operation when handling heavy or large specimens, while manual allows for precise and controlled adjustments.Q: What are the key safety features integrated into the machine?
A: The tester includes crucial safety elements such as overload protection and an emergency stop switch. These features ensure operator safety and protect the equipment during its operation, especially in demanding industrial settings.Tell us about your requirement

Price:
Quantity
Select Unit
- 50
- 100
- 200
- 250
- 500
- 1000+
Additional detail
Mobile number
Email

Other Products in 'Leather And Shoes Testing Machine' category
Contact Details
- 1st Floor, No. 3, Shugang Avenue, Hongmei Town,Dongguan Guangdong, China
- Mr. Shirley (Manager)
- Mobile : +8615580327593
- Send Inquiry
-

Derui Testing Equipment Co., Ltd

Derui Testing Equipment Co. Ltd
All Rights Reserved.(Terms of Use)
Developed and Managed by Infocom Network Private Limited.
Developed and Managed by Infocom Network Private Limited.
 English
 Spanish
 French
 German
 Italian
 Chinese (Simplified)
 Japanese
 Korean
 Arabic
 Portuguese